| A
: After you installed MySQL™ and MySQL™
Connector/ODBC successfully , you need to install a web-server
and database management utility so you can search and manage your database
easily .
We'll guide
you through the steps for setting up a web-server RaidenHTTPD
(free trial) and PhpMyAdmin (free version)
1.
download RaidenHTTPD 1.0x for Win2000/Xp
2.
run RaidenHTTPD.exe
IMPORTANT
WARNING : PLEASE AT LEAST LOGIN WEB-ADMIN FOR ONCE AFTER
SETUP, TO RESET YOUR ADMINISTRATIVE ACCOUNT AND PASSWORD,
OTHERWISE IT IS VERY DANGEROUS
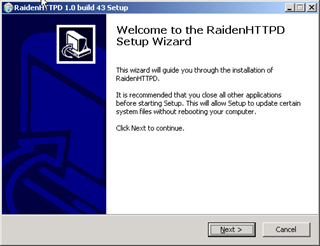
click
Next to continue.
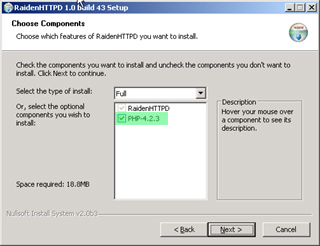
be
sure to install php to c:\php , unless you already have
it installed , the web administration and phpMyAdmin will
both make use of php scripting engine. |
3.
configuring RaidenHTTPD
the
first time setup wizard will pop up after the installation
is done.
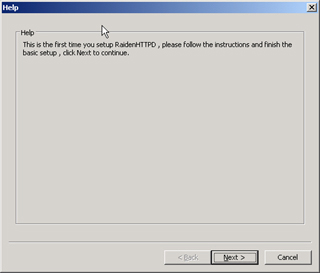
click
next to continue
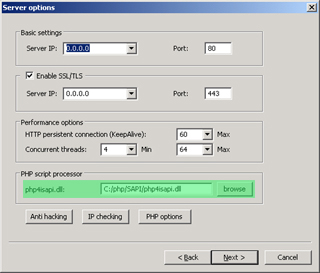
if
your server IP is set to 0.0.0.0 , it will bind to all
local IPs , make sure to enable SSL/TLS , and if you install
the php engine by the RaidenHTTPD installer , the php4isapi.dll
is already configured , otherwise you need to specify
its location by clicking the browse button
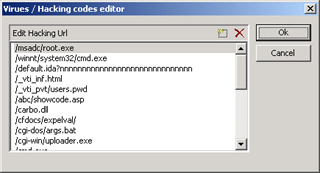
now
take a look at anti hacking , ip checking , php options
to see if you want to change anything
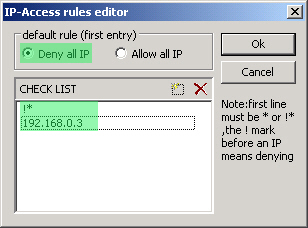
because we are setting up a web-server for database management
only at this moment , we'll recommend you to deny all
IP but allowing your own IP only

make
sure your register_globals is enabled , many web scripts
require it to work
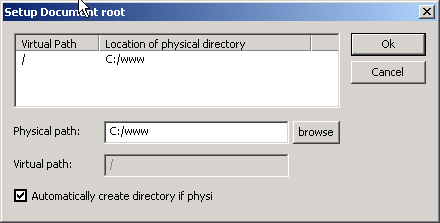
now
click next and you will be asked for picking up your web
root directory , specify a clean directory for your web
documents
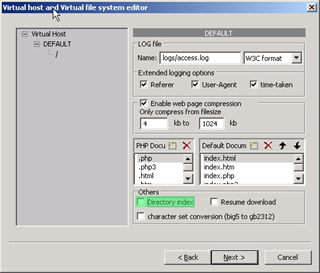
now
you are in the virtual host and virtual directory setup
dialog , there is nothing much to change but for security
reason we'll recommend you to disable 'directory index'
, but of course it's up to you , if you setup IP-checking
properly it's ok to enable it.
At
last , click next , install service , start service ,
and you are done , now the RaidenHTTPD tray icon will
appear

if
your service is not started successfully , it's probaby
there is something that occupies your port 80 already
, you can change the port to another one since we'll primarily
use SSL in the later tutorial
IMPORTANT
WARNING : PLEASE AT LEAST LOGIN WEB-ADMIN FOR ONCE AFTER
SETUP, TO RESET YOUR ADMINISTRATIVE ACCOUNT AND PASSWORD,
OTHERWISE IT IS VERY DANGEROUS
|
4.
download phpmyadmin , the php
MySQL™
administration interface
5.
connecting to your phpmyadmin
now
the start page of your phpmyadmin is https://127.0.0.1/phpMyAdmin-2.5.0/index.php
, you will notice that you can login immediatelly , because
you MySQL™
default user and password are not changed yet , this is
no good for security , we'll teach you how to change it
. but before we do that , you will need to finish the
setup for phpmyadmin first
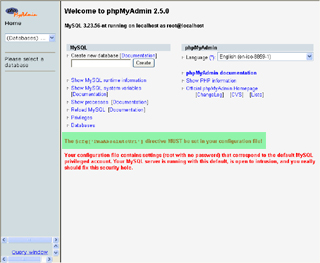
edit
config.inc.php by notepad
or ultraedit
find
$cfg['PmaAbsoluteUri'] = '';
and replace with $cfg['PmaAbsoluteUri']
= 'https://127.0.0.1/phpMyAdmin-2.5.0/';
save this file and reload your web page , and you will
find that the error message has gone
, but the warning message for your root and password is
still there , now we are going to change the default root
password
click
databases... , selcect mysql
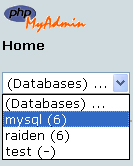
click
user table

click
browse

click
inert a new row , fill the necessary fields , remember
your username and password , this is to replace the default
root account so give it all the priviledges , click go
, to finish

after
the record is inserted , you can not use it immediatelly
, you must reload your MySQL™ , just reload
this URL by IE https://127.0.0.1/phpMyAdmin-2.5.0/index.php
, and you will find the place to reload
MySQL™
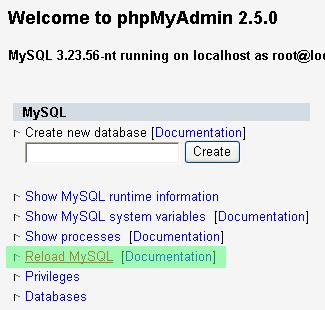
now
, make sure to reload MySQL before you test your account
, edit config.inc.php by
notepad or ultraedit
find
$cfg['Servers'][$i]['auth_type']
= 'config'; // Authentication method (config, http or
cookie based)?
$cfg['Servers'][$i]['user'] = 'root'; // MySQL user
replace
with
$cfg['Servers'][$i]['auth_type']
= 'http'; // Authentication method (config, http or cookie
based)?
$cfg['Servers'][$i]['user'] = ''; // MySQL user
save
file , reload URL https://127.0.0.1/phpMyAdmin-2.5.0/index.php
, and input the username/password you just created to
login the admin panel , if this works , you can now delete
all other default MySQL accounts for safety reason .
|
6.
creating account for MySQL™
Connector/ODBC
giving
the database root account for ODBC to use maybe too dangerous
, you need to create an account that has accesses to the
'raiden' database only
similar
to the above instructions , click databases...
, selcect mysql , click
user table
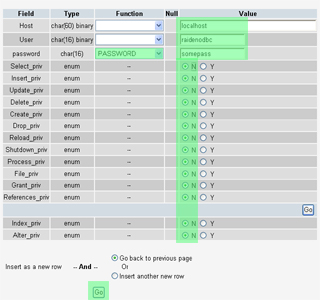
, click insert

fill the necessary fields , remember your username and
password , this is to be used for RaidenFTPD ODBC connection
, note that we don't give any priviledge
here , the host is localhost
, username is decided by
you , and password must be encrypted by PASSWORD
function
the
account is not read yet ,
click databases... , selcect
mysql , click db
table , click insert
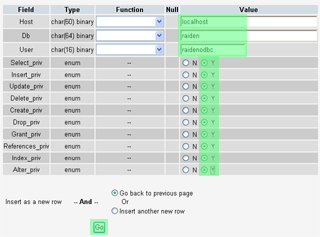
assign
the username you just created
to the raiden Db , Host is
localhost , we give it all
priviledges here , click Go to finish , now same as above
, Reload your MySQL
Now
try to change the username password you set in ODBC driver
(was root and empty) , set them to the username and password
you just created and click test
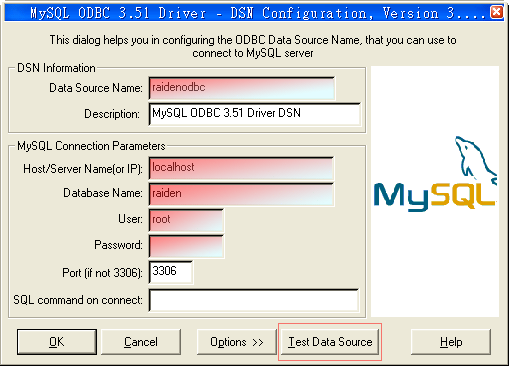

now
your MySQL™ and ODBC are ready for RaidenFTPD ODBC
support
|
7.
a few words
now
you are running MySQL with own user account and password
. aren't you ? NOT YET , you must goto mysql database
, user table , and delete all accounts that came with
MySQL and then reload your server .
|
|
That's
ALL |